Create your first wallet
A wallet is one of your real accounts inside Piff: your Mvola, your bank account, the cash box at home. It takes three screens to create one, and everything else in the app builds on it.
Piff does not connect to your bank: you decide which accounts to track. Each wallet has its own balance, currency and type, and every transaction you record debits or credits one of them. Start with the account you use the most — you can add the others as you go.
- 11 / 6
Open the form and enter the current balance
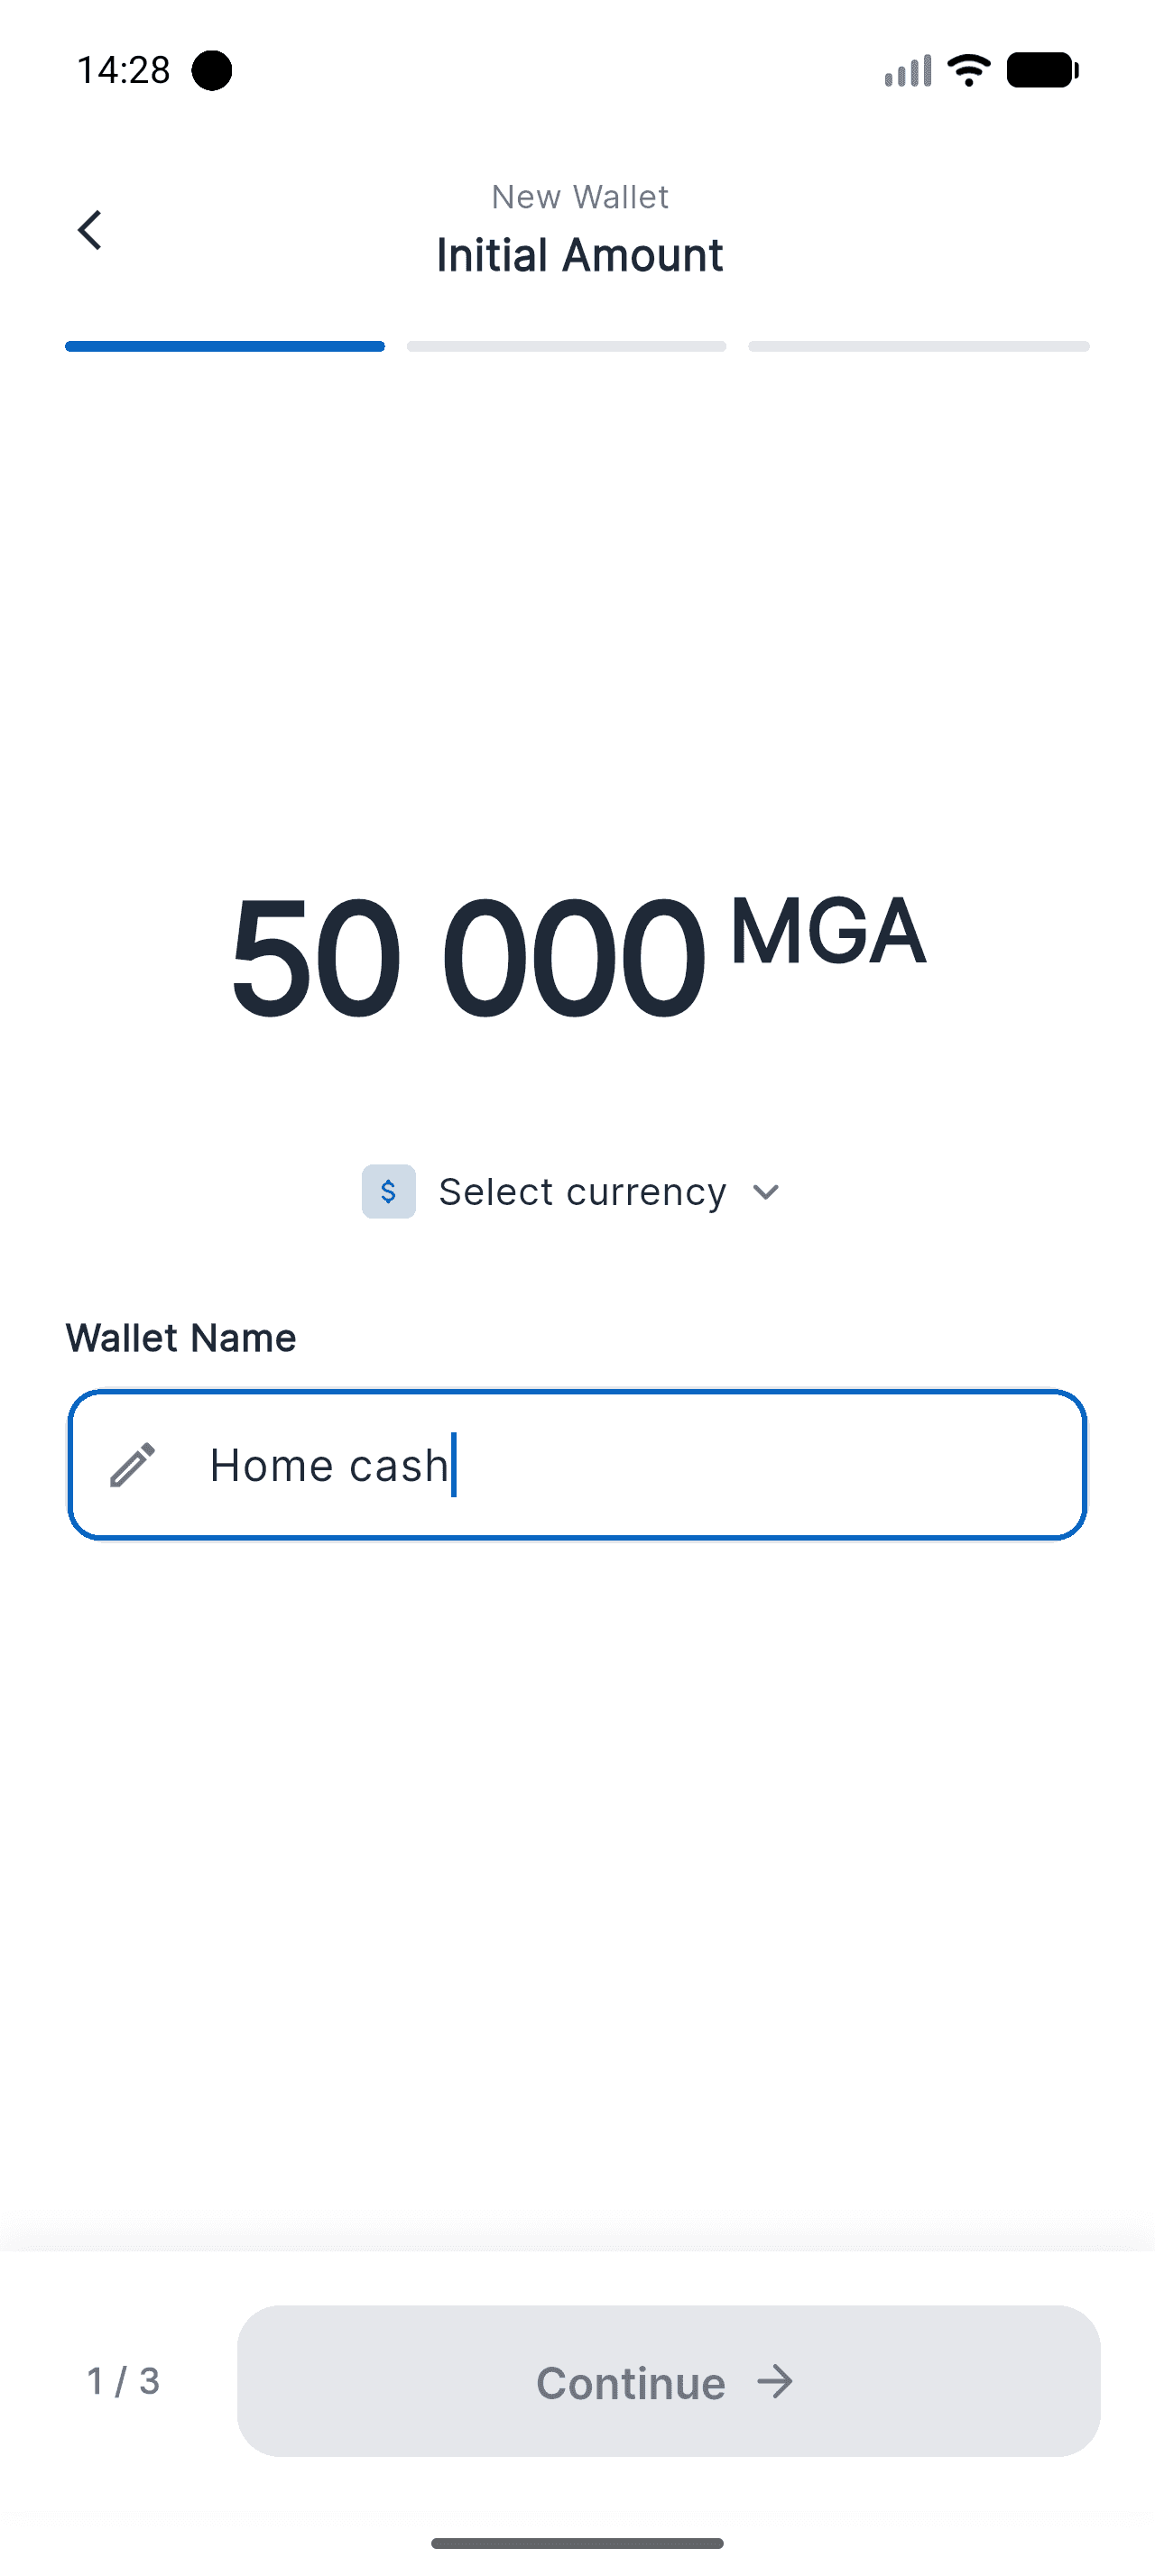
Profile > Add a wallet, or the + button at the top of the Manage Wallets screen. First screen: the amount actually sitting in that account today, then the name you want to give it.
The initial amount is not a target, it is your starting point. Enter today's exact balance so Piff is accurate from the very first transaction.
- 22 / 6
Pick the account currency
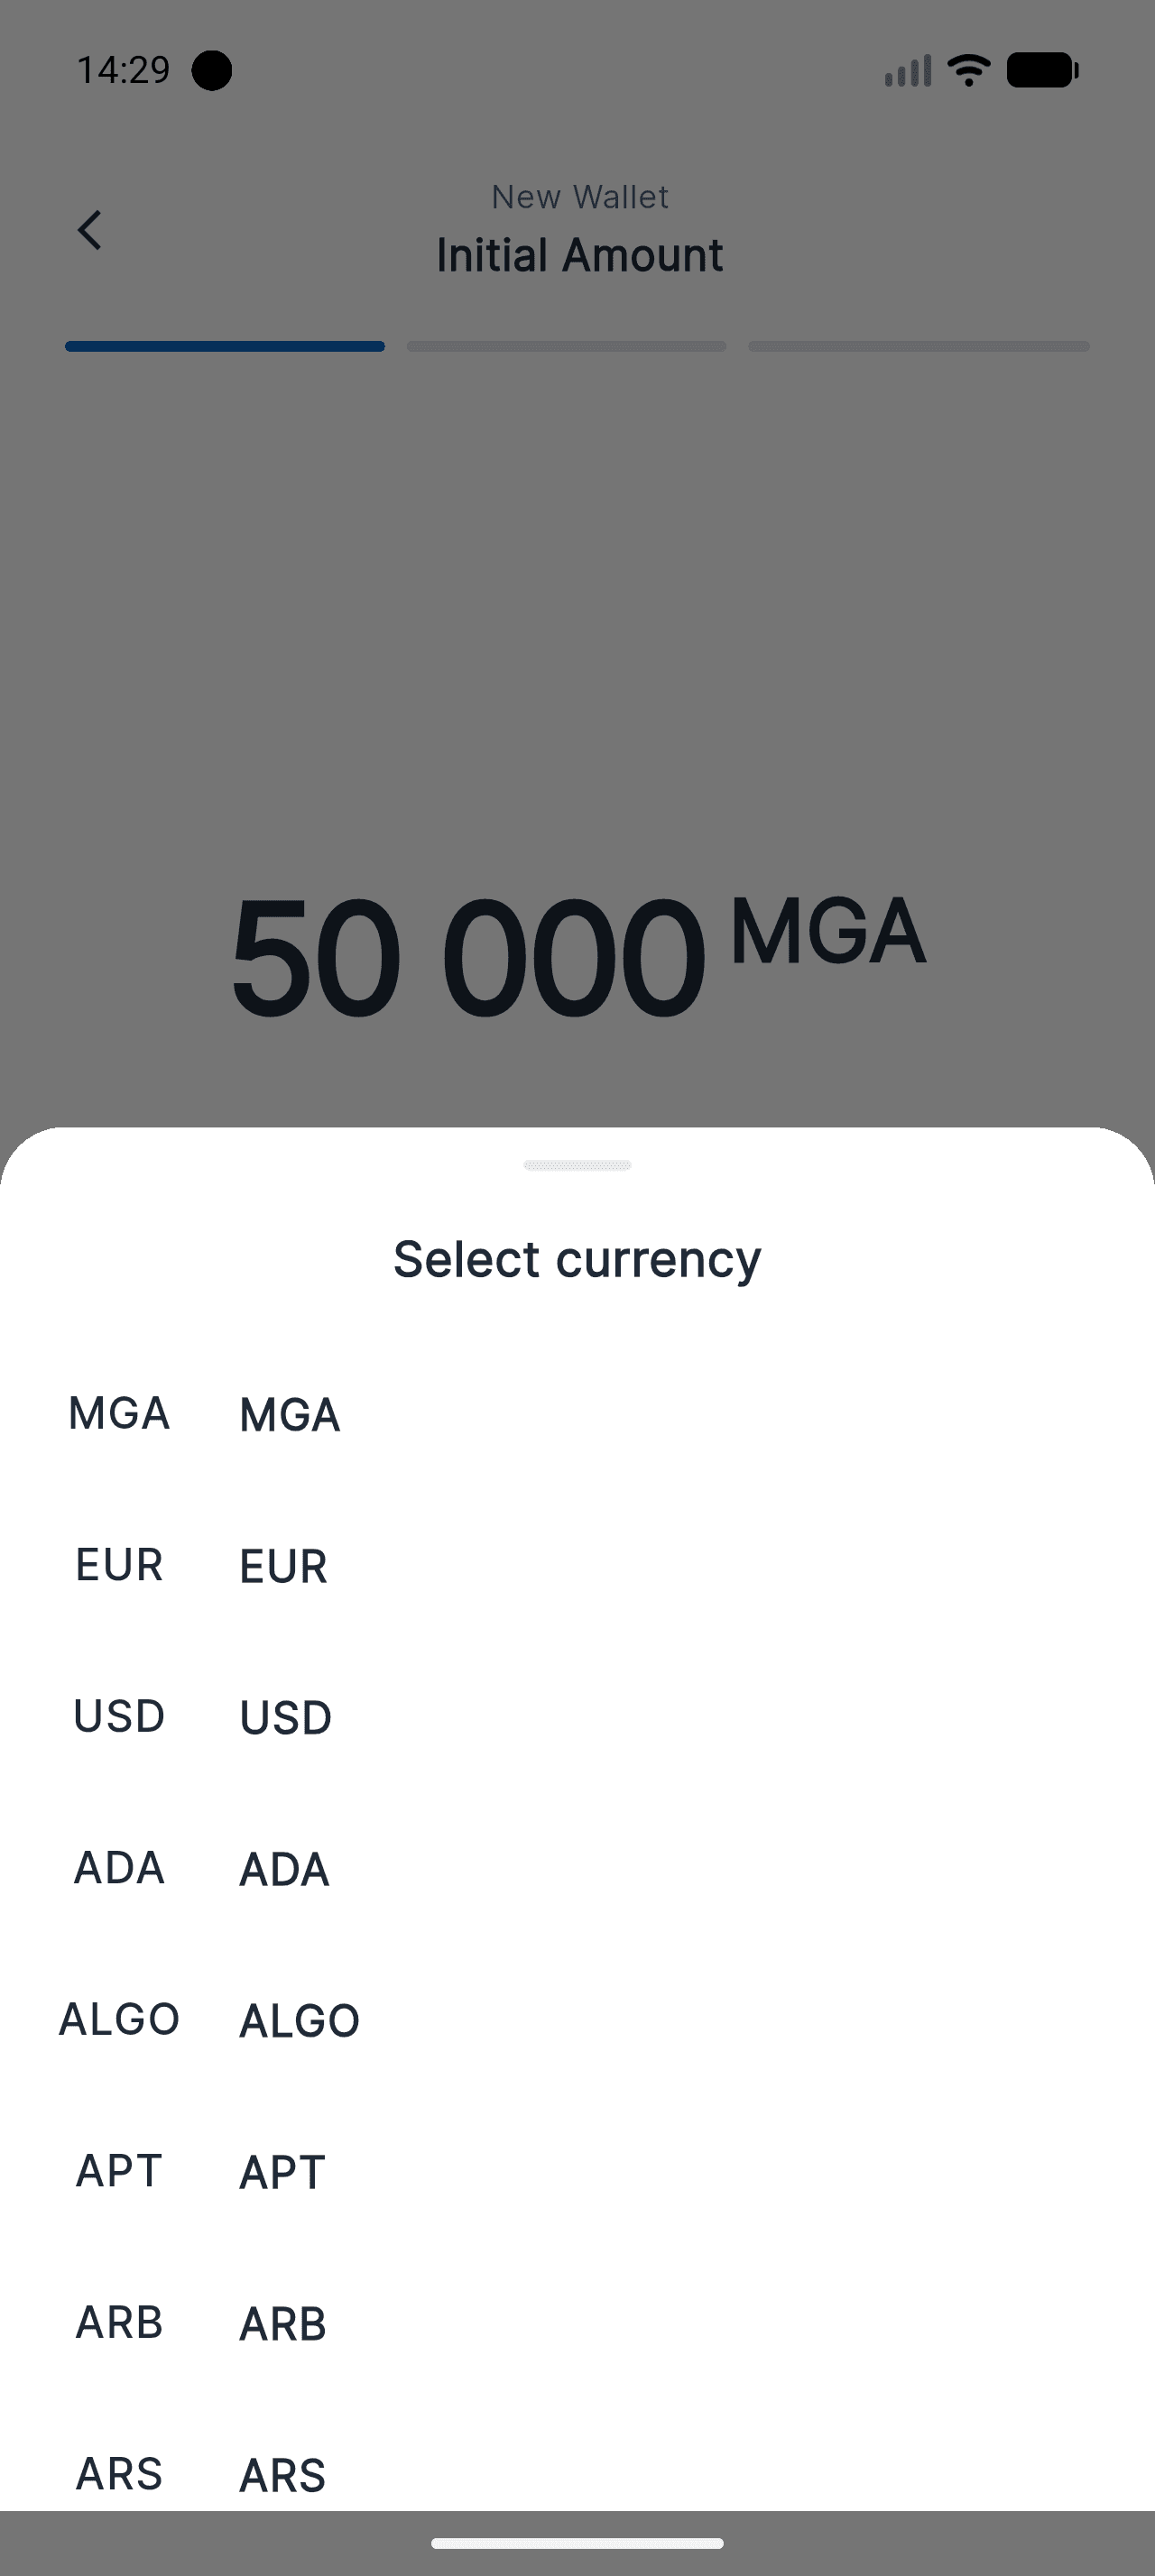
Below the amount, tap Select currency. MGA, EUR, USD and the main cryptocurrencies are available. Every wallet keeps its own currency: a euro account and an MGA account live side by side, with no forced conversion.
- 33 / 6
Say what kind of account it is
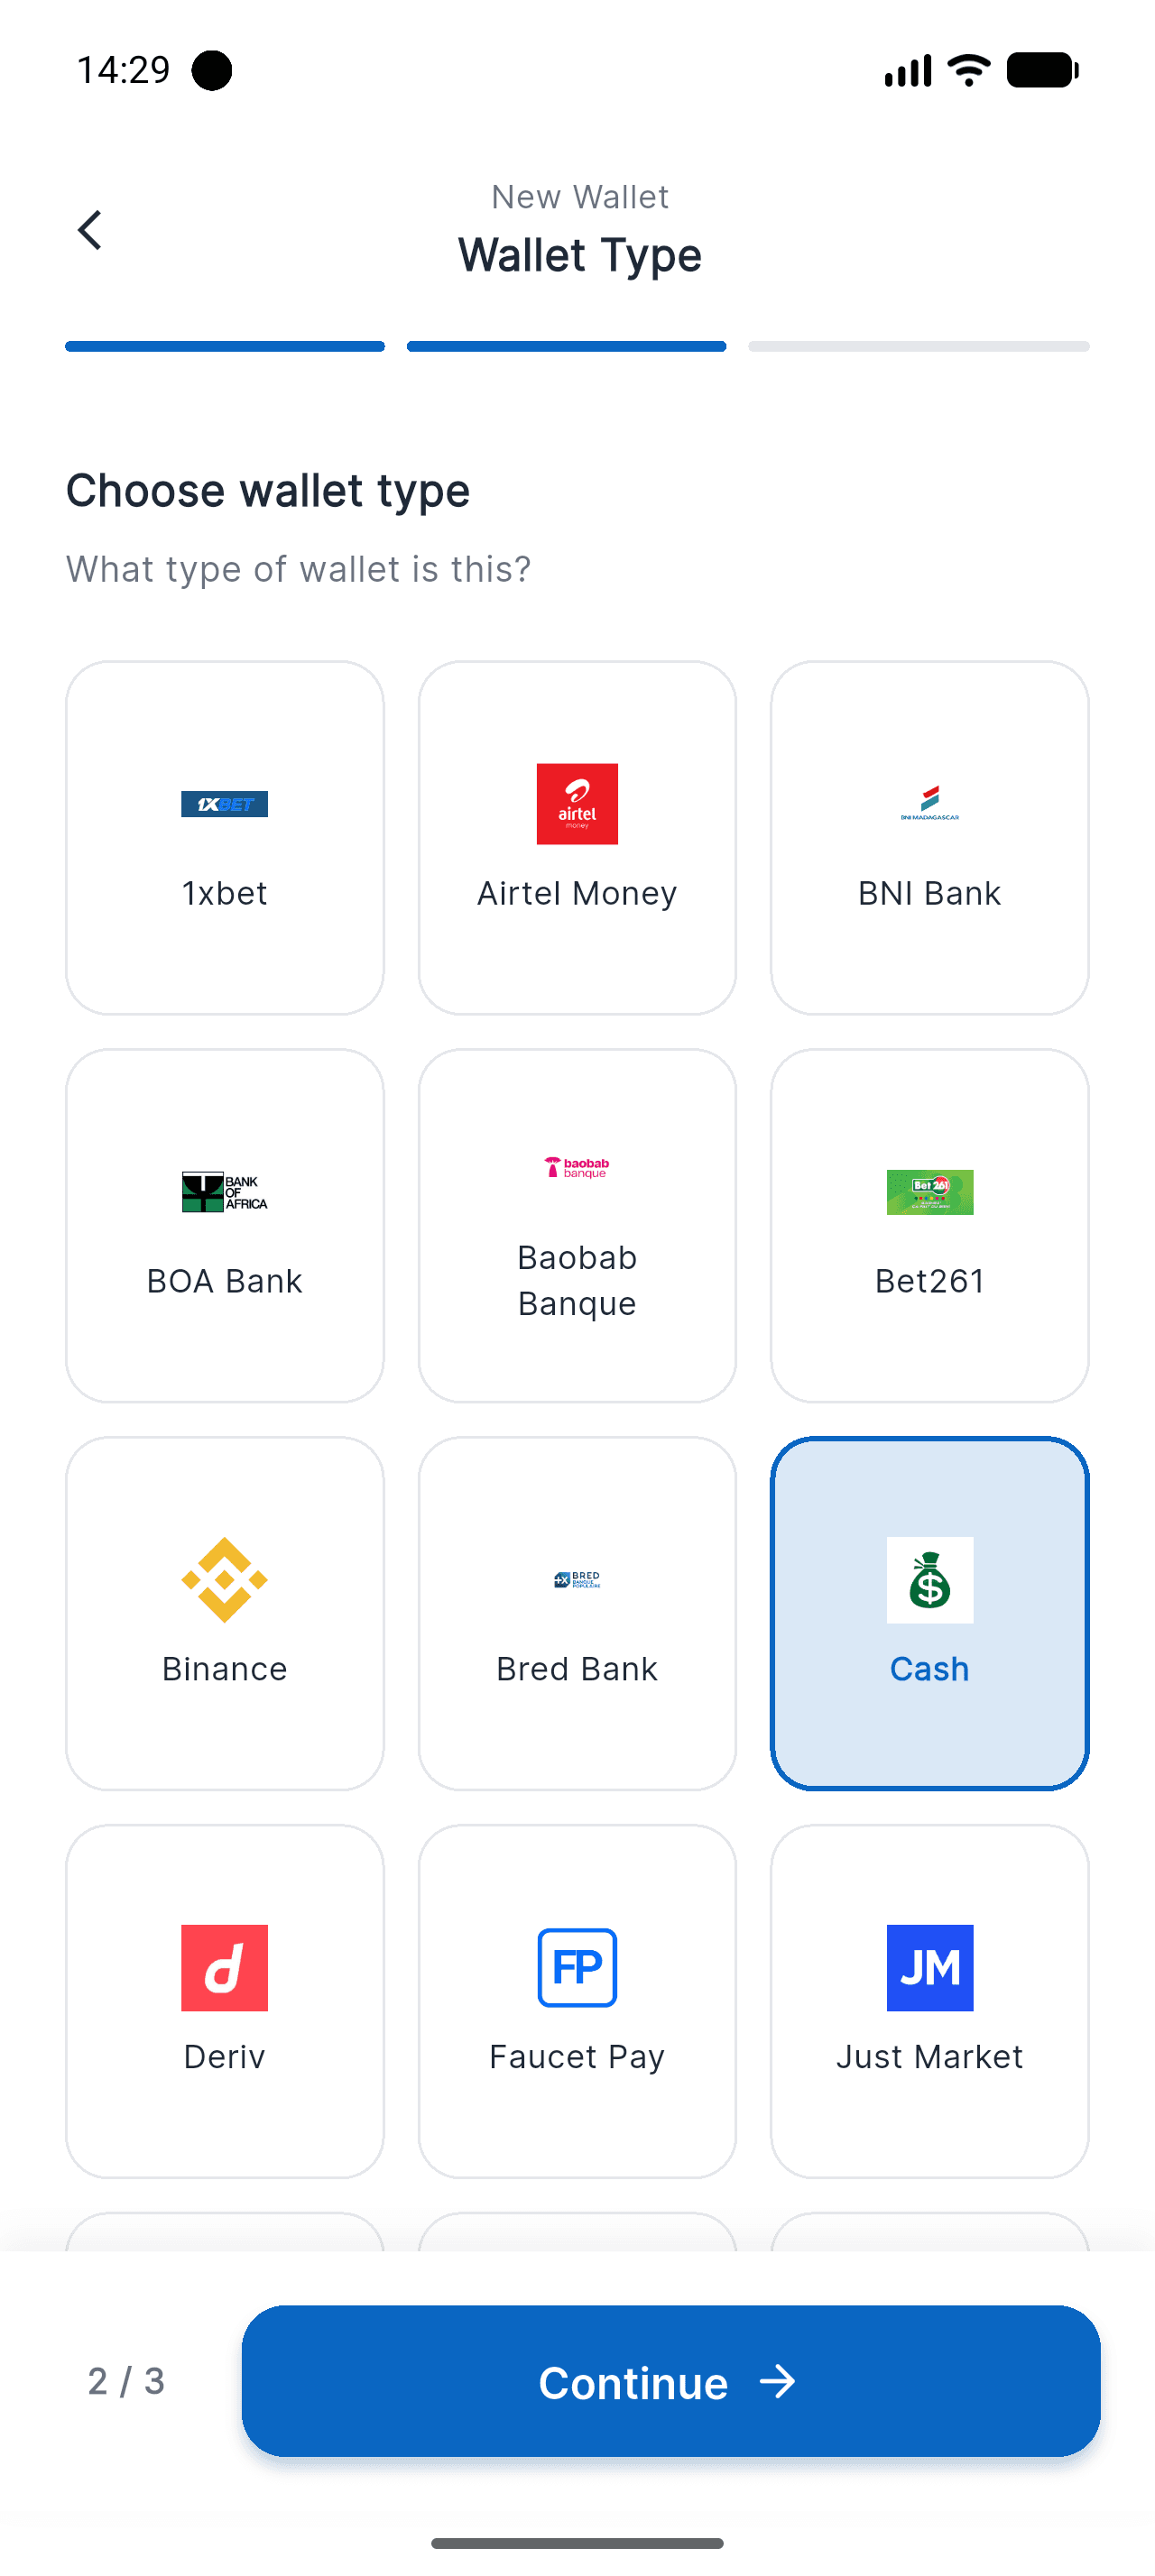
Second screen: Mvola, Orange Money, Airtel Money, BNI, BOA, BRED, Binance, Cash… The type drives the icon shown throughout the app and helps Piff group your accounts in the analytics.
Your bank or operator is missing from the list? Pick the closest type — the name you gave the wallet is what you actually read on screen.
- 44 / 6
Savings wallet, or everyday wallet?
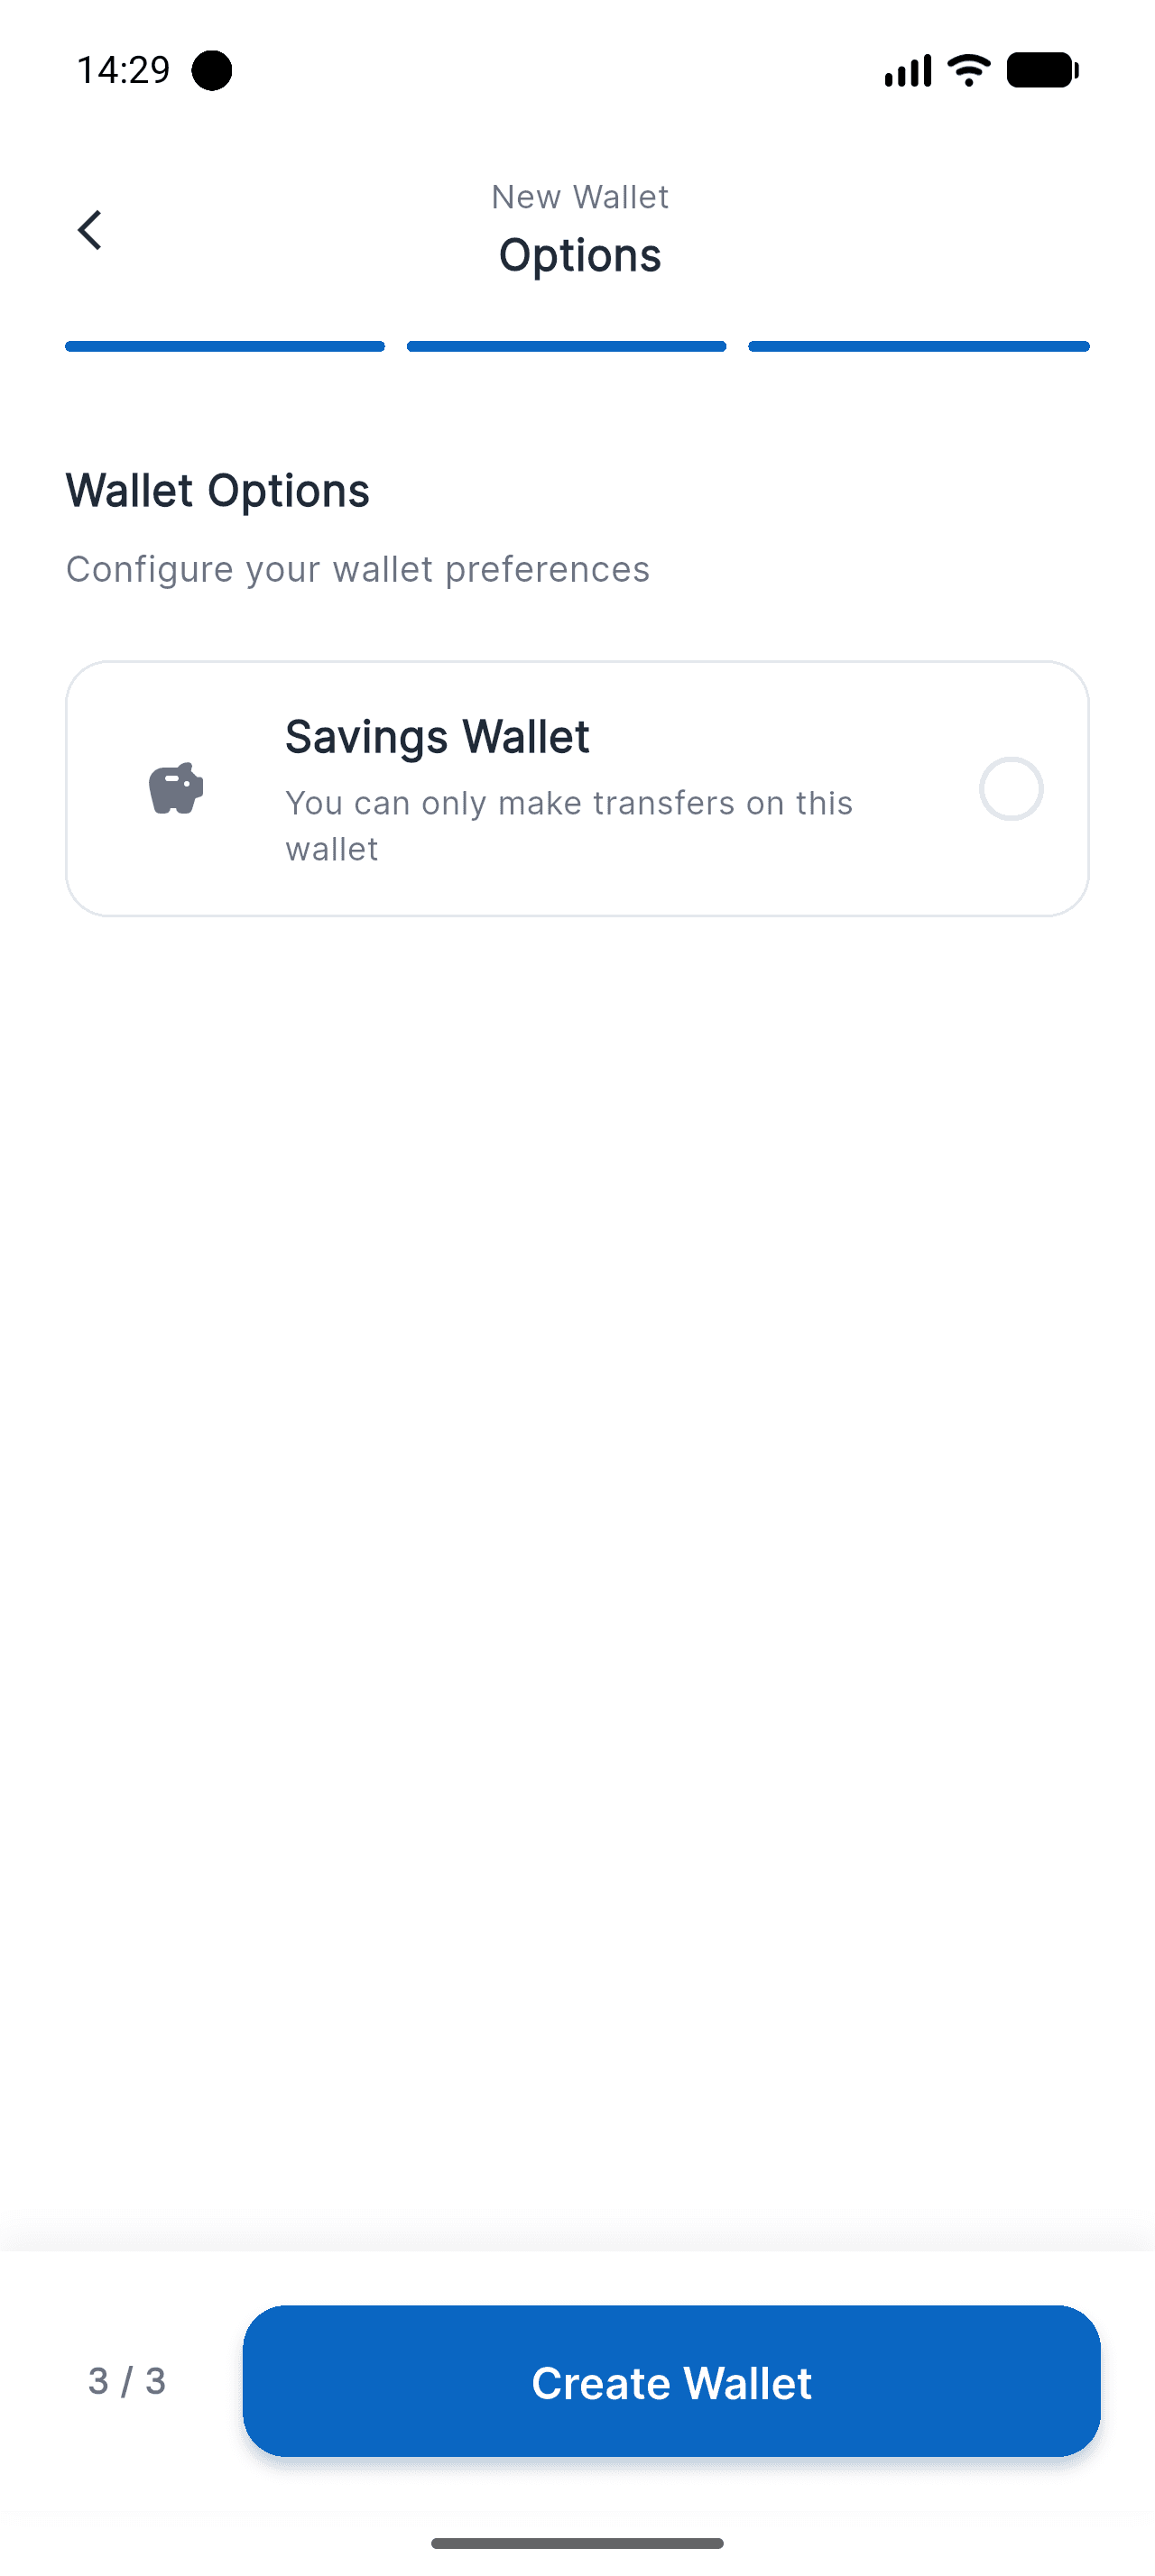
Third screen, a single option: Savings Wallet. Turn it on for an account where you set money aside — it then only accepts transfers, never a direct expense. Leave it off for a current account.
This is the option to enable for an interest-bearing savings account: you can then schedule the interest payout automatically.
- 55 / 6
Tap Create Wallet and it joins the list
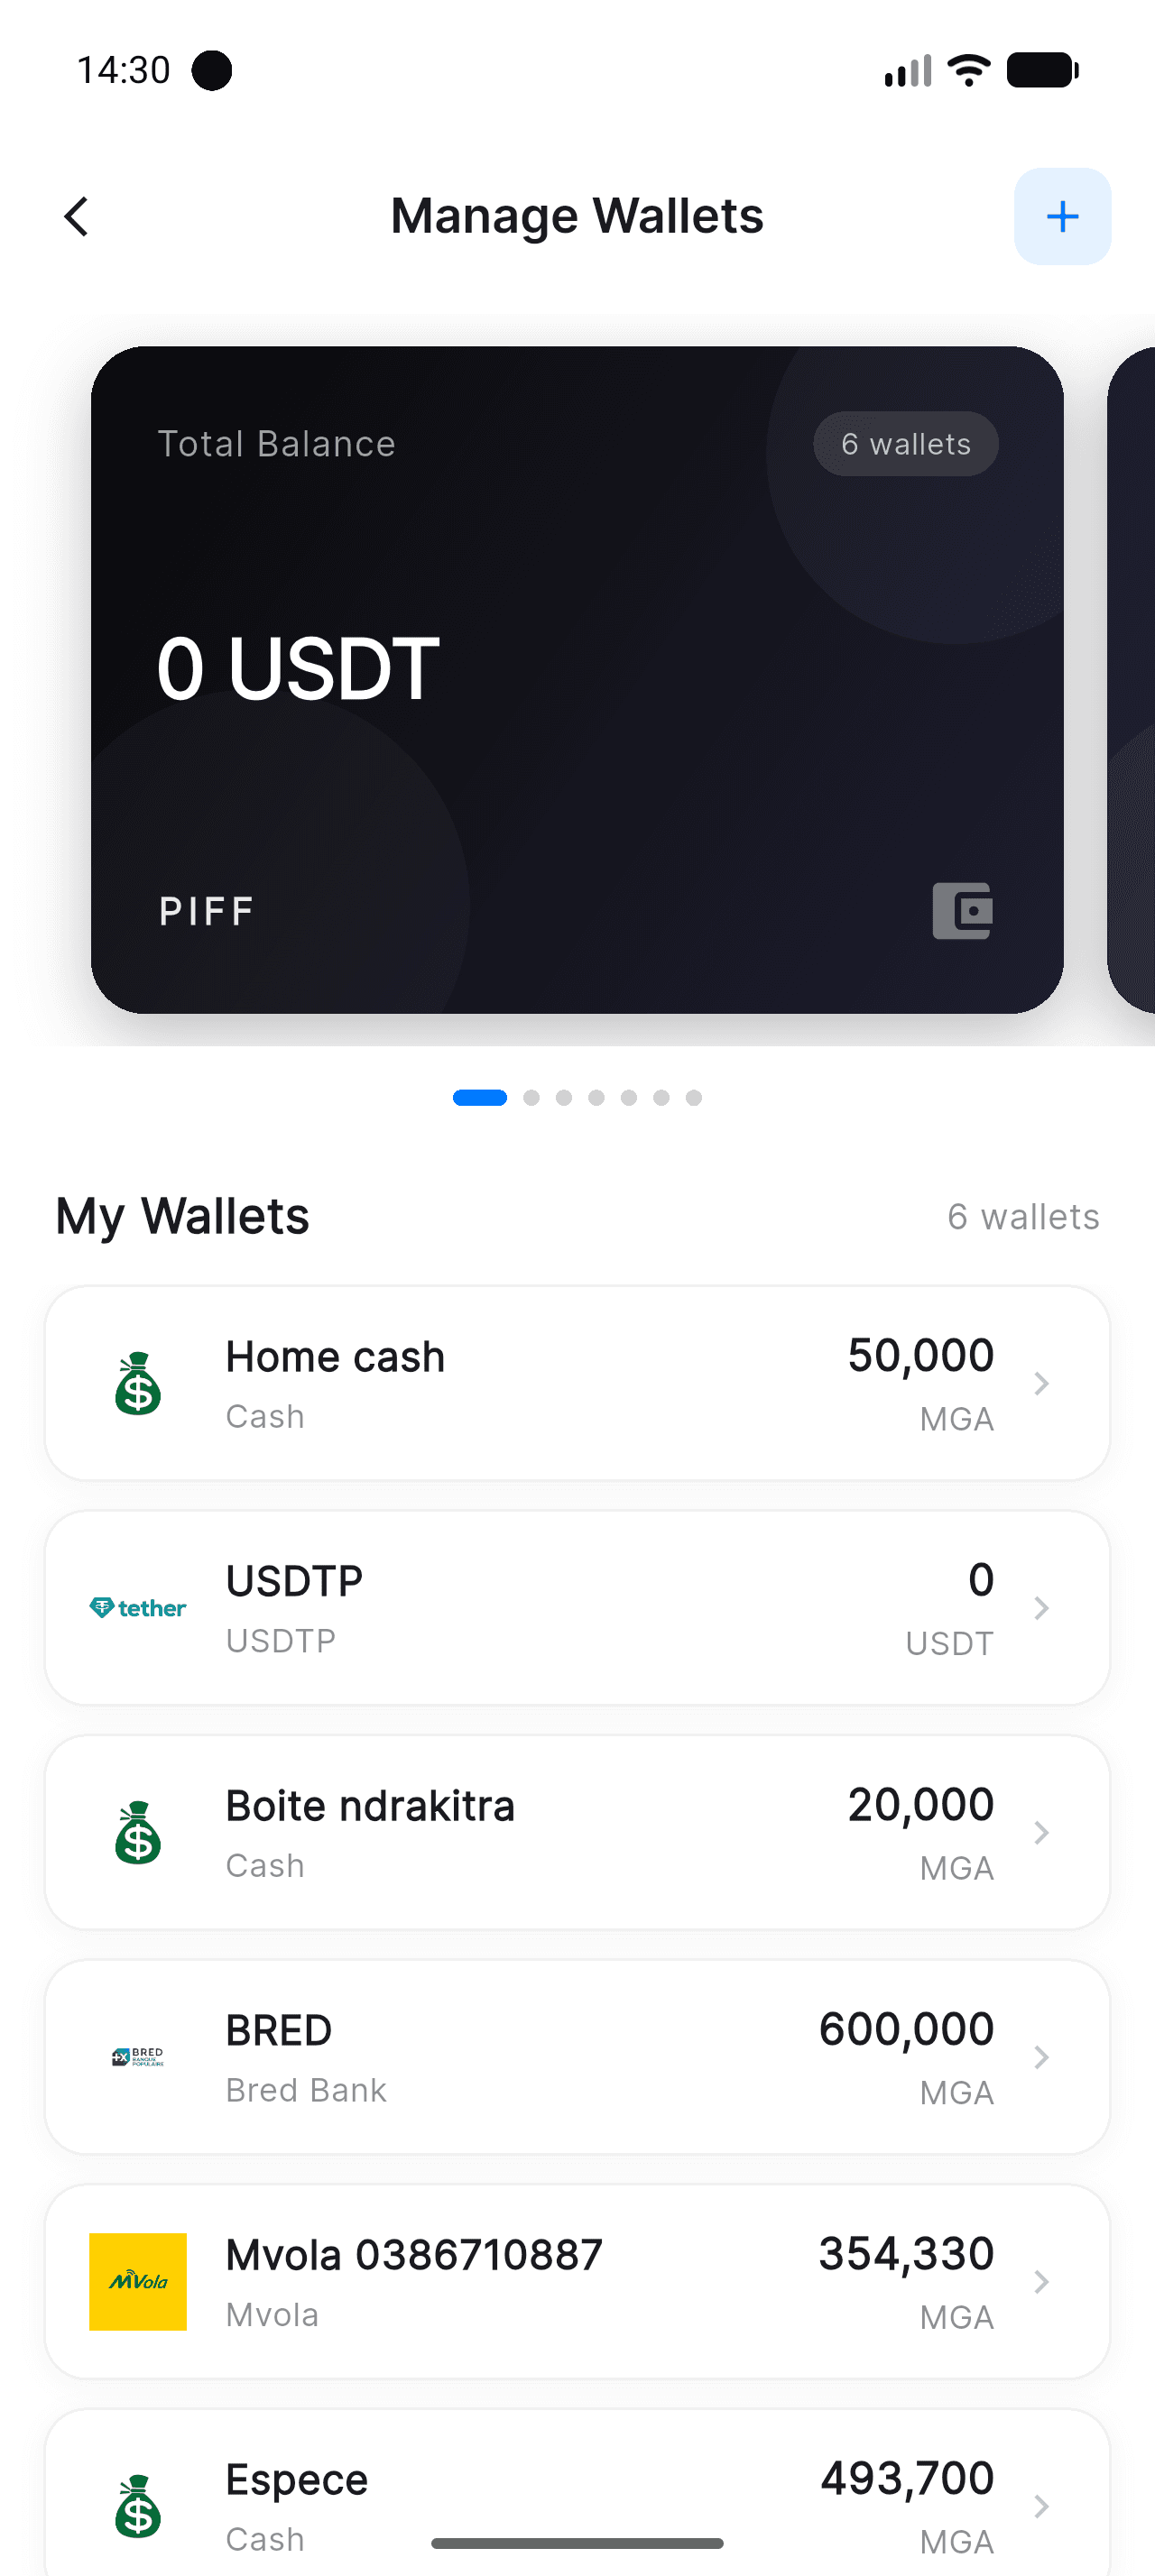
The new account appears straight away under My Wallets, with its balance and currency, and becomes available in every transaction form. The total at the top of the screen is recalculated currency by currency.
- 66 / 6
Open its card to review or delete it
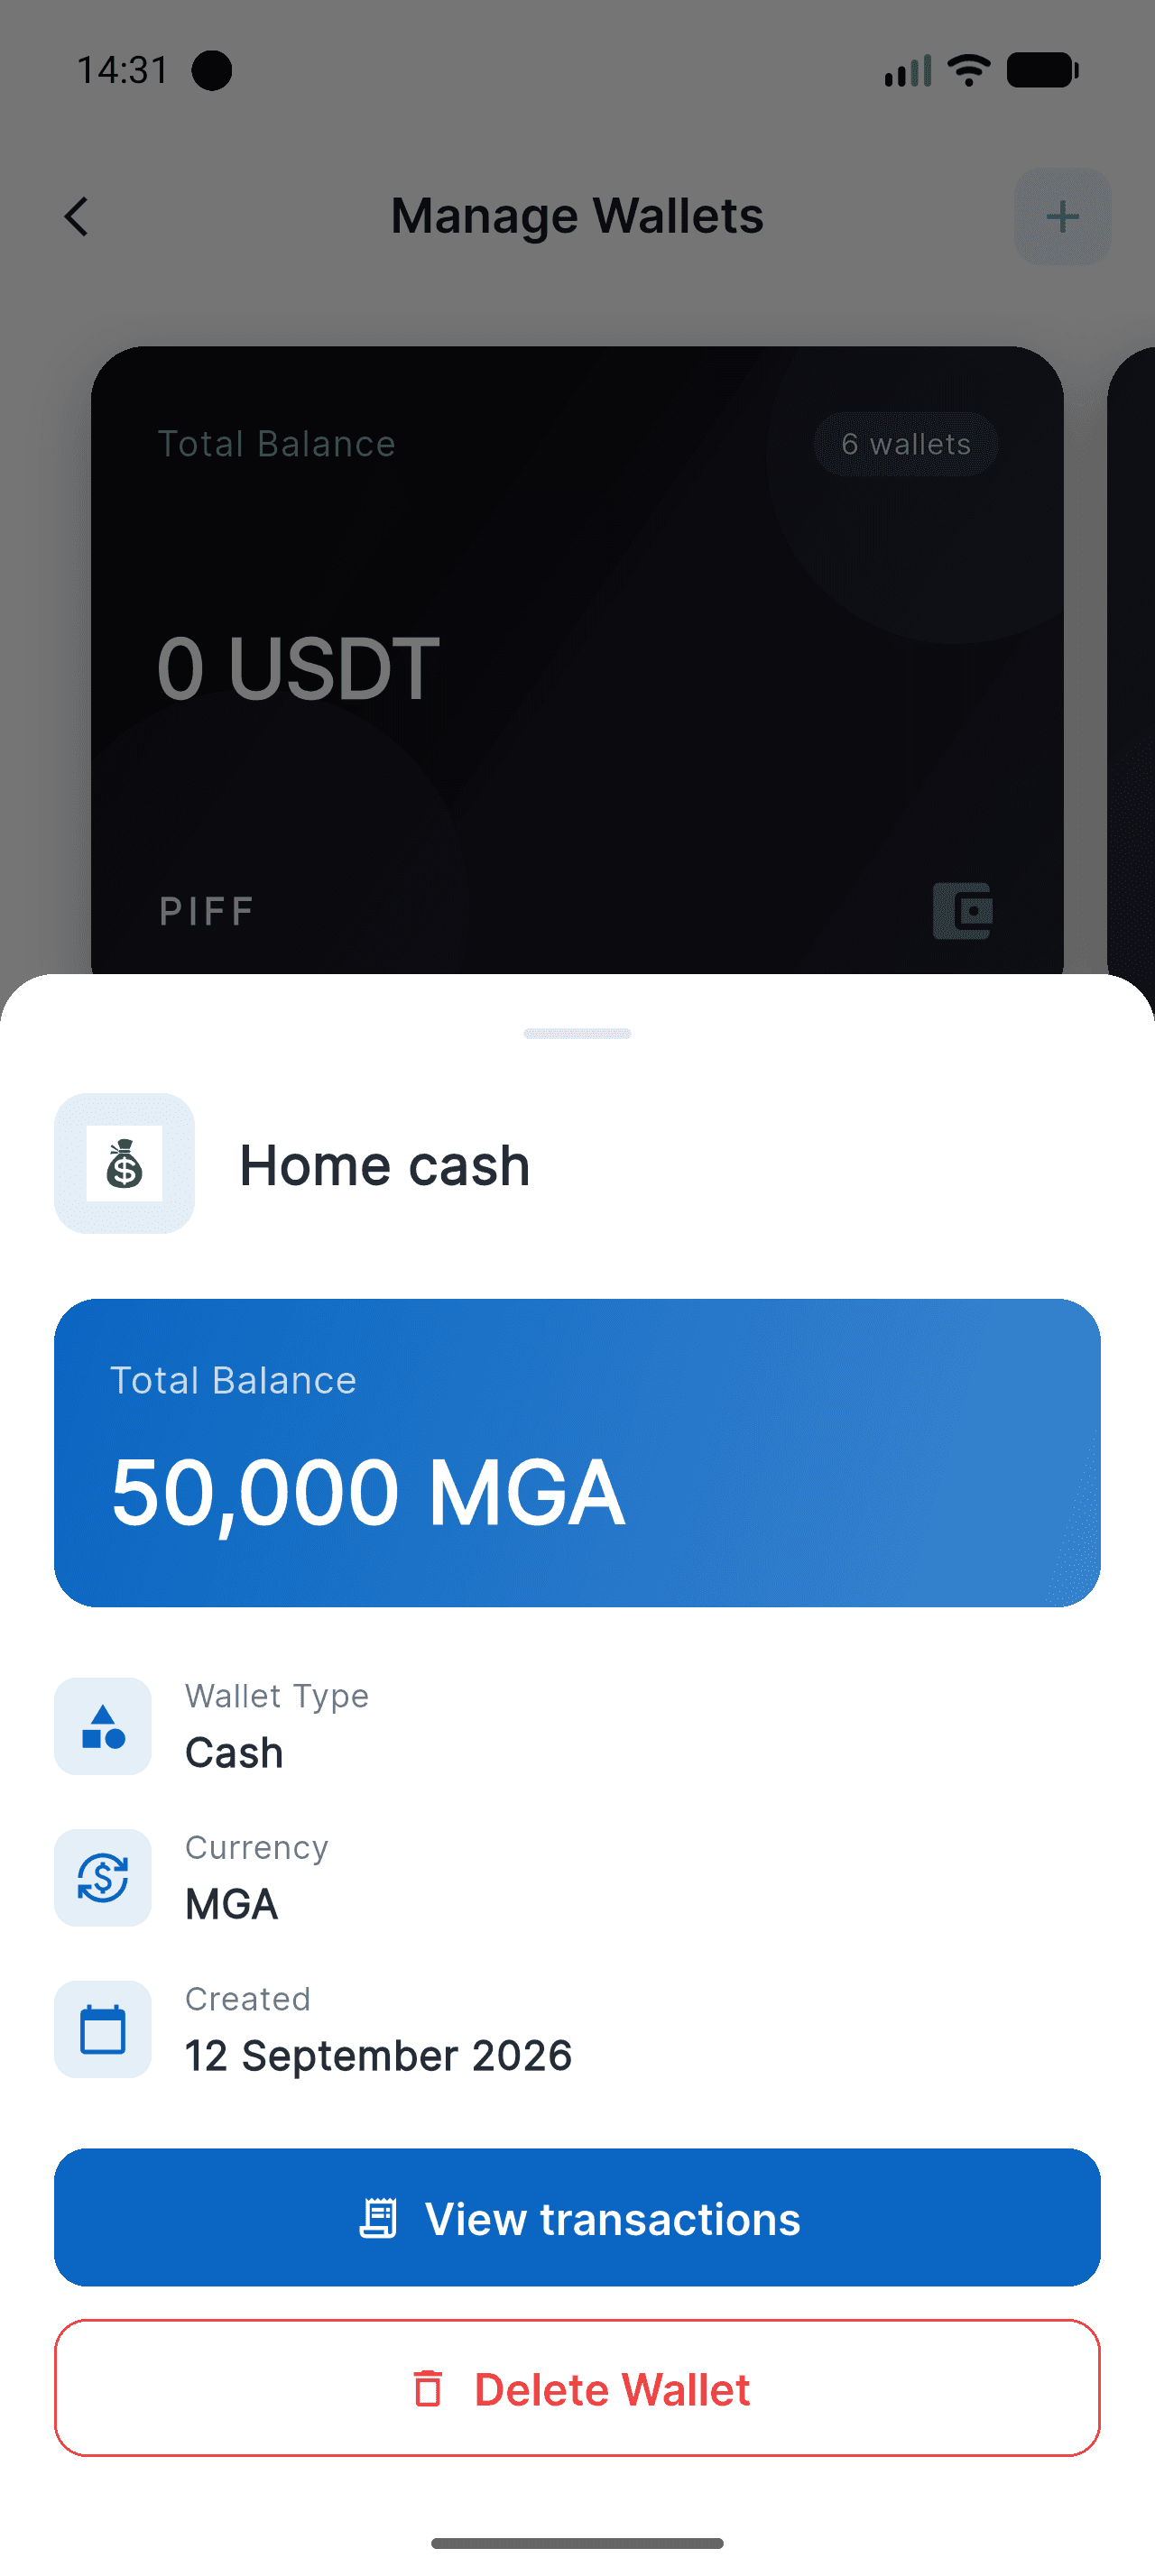
Tap a wallet in the list: its card shows the total balance, the type, the currency and the creation date, with a shortcut to its transaction history. This is also where you delete it.
Deleting a wallet also deletes the transactions attached to it. If you only want to set it aside, it is safer to leave it at zero.
Good to know
- Nothing is synced with your bank: Piff never asks for banking credentials, you enter the movements yourself.
- Create as many wallets as you need, in as many currencies as you need. Totals stay displayed currency by currency, with no rough conversion.
- A badly named wallet can be renamed at any time from its card: the name has no effect on balances or history.

Take control of your money
Free on iOS. Less than two minutes to get started.